Moving to a new home is exciting, but let’s be honest – packing up your kitchen can be a real headache! With all those dishes, glasses, and gadgets, it’s no wonder many people find the kitchen the toughest room to pack. Don’t worry though! I’m going to walk you through how to pack a kitchen for moving without losing your mind (or breaking your favorite coffee mug).
Why Taking Care with Kitchen Packing Matters
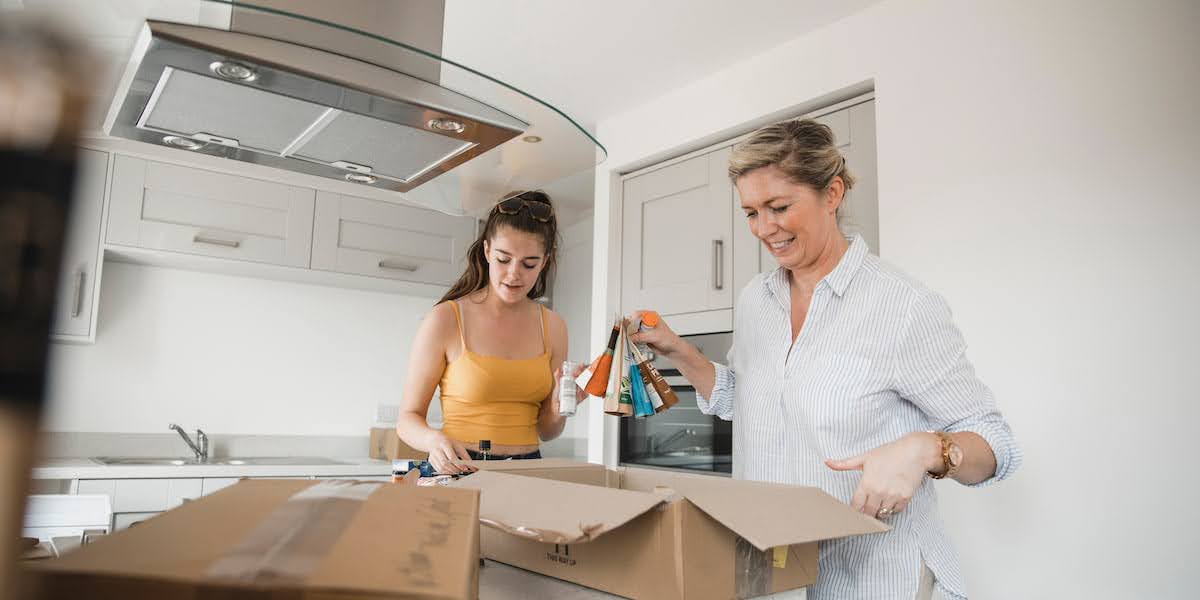
Your kitchen holds some of your most breakable and valuable items. From that blender you splurged on to your grandmother’s china, learning how to pack a kitchen for moving properly will save you from opening boxes of broken dishes at your new place.
Think about it – kitchens contain more fragile items per square foot than almost any other room in your home. Glass cups, ceramic plates, delicate wine glasses, and expensive appliances with easily damaged parts all need to make it safely to your new home. When you pack properly, you protect both the items and the memories attached to them.
If you’re living in Palm Beach County with a big, beautiful kitchen full of nice things, taking extra care with packing is even more important. After all, you want all those lovely items to arrive in one piece!
What Makes Kitchen Packing Different?
Kitchen packing is unique for several reasons:
- Items vary greatly in size and shape – from tiny measuring spoons to bulky food processors
- Many items are both heavy AND fragile – like glass baking dishes or ceramic cookware
- Lots of sharp objects – knives and other utensils need special handling
- Odd shapes – try packing a blender or stand mixer into a standard box!
- Food items – unlike other rooms, you’re also dealing with perishables and pantry goods
What Happens When You Don’t Pack Your Kitchen Properly?
Poor packing can lead to:
- Broken dishes and glassware
- Damaged appliances that may be expensive to replace
- Missing small items (measuring spoons, anyone?)
- Stained items from leaking liquids
- Unnecessary stress when you can’t find essential items in your new home
- Wasted money replacing things that broke during the move
Common Questions About Kitchen Packing
How long does it take to pack a kitchen?
For an average kitchen, you should allow 1-3 full days for packing, depending on how many items you have. Luxury kitchens in Palm Beach homes might take longer due to specialty items and higher-end appliances.
Should I hire professionals or pack my kitchen myself?
If you have valuable collections (like fine china or crystal) or simply want to save time and reduce stress, professional packers can be worth the investment. However, with careful planning and the right materials, you can successfully pack your kitchen yourself.
What items should I pack last?
Keep out a small set of essentials that you’ll use right up until moving day: one pot, one pan, a few dishes and utensils, coffee maker, and basic cleaning supplies.
What You’ll Need to Pack Your Kitchen
Before you start throwing things in boxes, gather these supplies:
- Medium and small boxes (heavy items get small boxes!) – Kitchen items get heavy fast, so smaller boxes are often better
- Plain packing paper (not newspaper – the ink can stain) – You’ll need more than you think, about 5-10 pounds for an average kitchen
- Bubble wrap for fragile items – Great for glasses and delicate pieces
- Packing tape – Get the good quality kind with a dispenser
- Permanent markers for labeling – Detail is important! “Kitchen – Everyday Dishes” is more helpful than just “Kitchen”
- Dish boxes with dividers for plates and glasses – These specialized boxes have extra reinforcement
- Plastic wrap – Perfect for keeping sets of items together or securing lids
- Ziplock bags in various sizes – Essential for small items, drawer organizers, and hardware
- Furniture blankets or towels – For extra padding between fragile items
- Box cutter – For breaking down boxes later
- Colored stickers or tape – For color-coding boxes by priority or room section
- Inventory sheet – To track what’s in each box (trust me, you’ll thank yourself later!)
Where to Find Packing Supplies
You can get packing supplies from:
- Moving supply stores (most complete selection but can be pricey)
- Home improvement stores like Home Depot or Lowe’s
- Online retailers like Amazon or Uline
- Free boxes from grocery stores, liquor stores, or bookstores (just make sure they’re clean and sturdy)
- Friends who have recently moved and might have leftover supplies
How Much Will Supplies Cost?
Budget between $75-$200 for a typical kitchen packing supply kit, depending on the size of your kitchen and quality of supplies. For Palm Beach luxury kitchens with lots of specialty items, you might spend toward the higher end of that range or more.
Eco-Friendly Packing Options
If you’re environmentally conscious, consider:
- Biodegradable packing peanuts
- Recycled packing paper
- Reusable plastic bins (can be rented from some moving companies)
- Using towels, linens, and clothing as packing material
- Biodegradable tape
- Second-hand boxes that can be recycled again after your move
Having everything ready before you start will make the job go much smoother. Taking an hour to gather all these supplies might seem like a delay, but it will save you countless trips to the store mid-packing and help ensure nothing gets damaged due to improvised packing methods.
Step-by-Step Guide: How to Pack a Kitchen for Moving
1. Start Early and Make a Plan
Don’t leave kitchen packing until the last minute! Start about a week before moving day, and break it down into smaller tasks. Maybe tackle one cabinet or drawer each day.
Make a list of what you have, and decide what’s coming with you and what might be better off donated or sold. If you have a large kitchen with lots of stuff, this planning step is super important.
2. Pack the Stuff You Rarely Use First
Begin with things you won’t need until after the move:
- That fancy serving platter you use twice a year
- Holiday-themed dishes and cookware
- Appliances you don’t use regularly (goodbye, bread maker!)
- Extra sets of dishes or glasses
This way, you can keep using your kitchen while you’re packing.
3. Clean Out and Organize as You Go
Moving is the perfect excuse to finally clean out your kitchen:
- Group similar items together as you pack
- Toss expired food and spices
- Donate duplicate tools or appliances you never use
- Set aside valuable items that need special handling
4. How to Pack Dishes and Glasses Without Breaking Them
Fragile items need extra TLC:
- Put crumpled packing paper at the bottom of each box for cushioning
- Wrap each plate separately with packing paper
- Place plates on their edges (like records), not flat
- Wrap each glass individually, with extra paper around stems
- Mark these boxes “FRAGILE” and “THIS SIDE UP”
If you have fancy china or crystal pieces, you might want to double-box them for extra protection.
5. Packing Pots, Pans, and Bakeware
These items are sturdy but can still get damaged:
- Stack pots and pans with paper between them to prevent scratches
- Place lids upside down or wrap them separately
- Protect non-stick surfaces with soft paper or dish towels
- Use kitchen towels between baking sheets and trays
6. How to Pack Kitchen Appliances
Small and large appliances need different approaches:
- Keep original boxes if you have them – they’re designed to protect!
- For appliances without boxes, wrap in bubble wrap and place in sturdy boxes
- Make sure everything is clean and dry before packing
- Secure loose parts with tape
- Wrap cords and tape them to the appliance
For expensive appliances like those fancy coffee makers many Palm Beach homes have, consider professional packing if you don’t have the original box.
7. Don’t Forget About Food
Be smart about packing food:
- Eat or donate perishables before moving
- Use small, sturdy boxes for canned goods and non-perishables
- Put spices and dry goods in ziplock bags first
- Pack a separate box of essentials you’ll want right away
- Use coolers for refrigerated items on moving day
Tips for Packing a Moving Truck With Kitchen Boxes
Once everything’s packed, you need to load it all safely. The way you arrange boxes in your moving truck can be just as important as how you packed them. Let’s dive into some helpful tips for packing a moving truck, especially for kitchen items.
The Science Behind Truck Packing
There’s actually a method to properly loading a moving truck:
- Weight distribution – Keeping the truck balanced prevents shifting during travel
- Item protection – Proper placement prevents damage
- Loading/unloading efficiency – Strategic packing saves time and energy
- Space maximization – Getting the most out of the truck space you’re paying for
Think of it as a real-life game of Tetris, except the consequences are a bit more serious than a “game over” screen!
Where to Put Kitchen Boxes in the Truck
Kitchen boxes should be placed carefully in the truck:
- Put heavy boxes (pots, pans, appliances) on the floor of the truck – This keeps the center of gravity low
- Place boxes with fragile items on top of flat, sturdy items – never under heavy stuff!
- Keep boxes with “this side up” arrows pointing the right way – Those arrows aren’t just suggestions
- Don’t stack too high or things might fall – A good rule is no higher than chest height
- Place flat items like cutting boards between fragile boxes for extra protection
- Create a “wall” of same-sized boxes for stability rather than pyramid shapes
- Use the truck’s tie-down points to secure rows of boxes
- Keep small valuable kitchen items in the cab with you if possible
Common Truck-Loading Mistakes to Avoid
Many people make these errors when loading kitchen items:
- Putting heavy boxes on top of lighter ones – This can crush items below
- Failing to secure items with straps – Even careful driving won’t prevent some shifting
- Leaving empty spaces that allow boxes to slide during transit
- Mixing kitchen boxes with other items making unpacking confusing
- Placing liquid items above anything else – Even sealed liquids can leak during a move
Loading in the Right Order
Think about unpacking when you’re loading:
- Load kitchen essentials last so they come out first – Your coffee maker will thank you
- Keep cleaning supplies where you can get to them easily – You’ll want these right away
- Try to keep all kitchen boxes together in the truck – This makes unpacking more organized
- Create a “first night” box with essential kitchen items you’ll need immediately
- Load items based on room priority – If you plan to unpack the kitchen first, load it last
- Consider the layout of your new home – Which rooms will you set up first?
- Keep an inventory list of what’s loaded where – Tape it to the inside of the truck for reference
Questions About Truck Packing
How do I know what size truck I need? For a 1-bedroom apartment kitchen, a 10-foot truck usually suffices. For a 3-4 bedroom home with a full kitchen, you’ll likely need a 20-26 foot truck. When in doubt, go one size larger than you think you need.
Should I hire professional movers or pack the truck myself? If you have high-value kitchen items or limited physical ability, professional movers might be worth the cost. If you’re comfortable with heavy lifting and have friends to help, DIY can save money.
How long does it take to load a truck? Plan for about 2-4 hours for a small move and 8+ hours for a larger household. Kitchen items often take longer due to their fragility.
Keeping Things Safe During the Drive
To protect fragile kitchen items during the move:
- Fill empty spaces with padding so boxes don’t shift – Blankets, pillows, or packing paper work well
- Use straps to secure tall stacks – Most trucks have tie-down points along the walls
- Keep kitchen boxes away from things that might leak – Like cleaning supplies or plants
- Drive carefully – Take turns slowly and avoid sudden stops
- Consider temperature sensitivity – Some kitchenware (fine china, crystal) can be affected by extreme heat or cold
- Take breaks during long drives to check that nothing has shifted
- Park on level ground whenever possible to prevent items from tipping
- Be extra cautious with specialized kitchen equipment – Wine fridges, espresso machines, etc.
Special Tips for Palm Beach Luxury Kitchen Moves
For high-end Palm Beach kitchens with valuable items:
- Consider climate-controlled transport for temperature-sensitive items like wine collections
- Take photos of expensive appliance setups before disassembly for easy reference
- Use custom crating for extremely valuable items like antique china cabinets
- Schedule your move during off-peak traffic times – Palm Beach traffic can add unnecessary time and jostling to your move
- Consider insurance for high-value kitchenware beyond standard moving coverage
What About Rental Trucks vs. Professional Movers?
If you’re using a rental truck:
- Request a truck with a loading ramp (easier for heavy kitchen appliances)
- Check if they offer furniture pads and moving blankets
- Make sure you’re comfortable driving a large vehicle
- Understand the insurance coverage offered
If using professional movers:
- Ask about their experience with high-value kitchen items
- Inquire about their packing materials and methods
- Get clear on liability for damaged items
- Ask if they have specialized equipment for moving appliances
Following these tips for packing a moving truck will help make sure everything arrives safely at your new home. Remember that a little extra time spent loading properly can save hours of frustration and potential losses later!
What to Unpack First in Your New Kitchen
When you get to your new place, unpack these kitchen items first:
- Cleaning supplies
- One pot and one pan
- A few plates, bowls, and cups
- Coffee maker (let’s be real – you’ll need coffee!)
- Basic utensils and a cutting board
- Paper towels and dish soap
This gives you the basics to function while you unpack the rest at a reasonable pace.
Timeline for Packing Your Kitchen
Here’s a simple timeline to keep you on track:
- Two weeks before: Start using up food in your fridge and pantry
- One week before: Pack specialty items and things you rarely use
- Three days before: Pack most of your kitchen, leaving just the basics
- Day before: Pack all but what you need for last-minute meals
- Moving day: Pack the last few items and clean up
Mistakes to Avoid When Packing Your Kitchen
Even with the best intentions, packing mistakes happen. But knowing the common pitfalls ahead of time can save you headaches, broken dishes, and even money. Watch out for these common packing errors:
Most Common Kitchen Packing Mistakes
- Overfilling boxes (especially with heavy dishes) – That box might hold 12 plates, but can you lift it?
- Using newspaper instead of packing paper (ink stains are no fun) – Black smudges on your white dishes is not the look you’re going for
- Not labeling boxes clearly – “Kitchen Stuff” isn’t helpful when you’re looking for the coffee maker
- Rushing and not wrapping items properly – Those extra few seconds per item can prevent heartbreaking breaks
- Forgetting to set aside essentials for your last day and first day – You’ll still need to eat during the move!
- Mixing items from different rooms – Finding a spatula with your bathroom towels isn’t efficient
- Packing items while they’re still dirty – Food residue can attract pests during storage or transit
- Failing to take photos of complex setups – How did that spice rack go together again?
- Taping boxes incorrectly – Both the bottom AND top need proper taping in an H-pattern
- Not protecting sharp items – Knives should be wrapped individually and labeled clearly
The Psychology of Packing Mistakes
Why do we make these errors? Often it comes down to:
- Moving fatigue – As you get tired, your careful packing gets sloppier
- Underestimating time needed – Rushing leads to cutting corners
- Emotional attachment – Being overly careful with some items while neglecting others
- Overconfidence – “I don’t need to wrap this mug, it’s sturdy!”
- Disorganization – Not having a system leads to chaos
Real Costs of Packing Mistakes
Poor packing doesn’t just lead to broken items; it has other consequences:
- Replacement costs – That $50 blender or $200 knife set adds up quickly
- Time wasted searching – Spending hours looking for essential items
- Emotional distress – Losing sentimental items can’t be measured in dollars
- Delayed settling in – Not being able to cook proper meals for weeks
- Storage issues – Improperly packed items take up more space
Questions People Ask About Kitchen Packing Mistakes
What’s the biggest mistake people make when packing kitchens? Underestimating the time it takes. What seems like a one-day job often stretches to three days for a full kitchen.
How can I avoid breaking glasses and dishes? Wrap each item individually, use dish boxes with dividers, don’t overpack, and clearly mark boxes as fragile.
What should I do if I don’t have enough time to pack properly? Consider hiring professionals for just the kitchen portion of your packing, or at minimum, get help with valuable or fragile items.
Smart Solutions to Common Packing Problems
- For heavy items: Use many small boxes instead of few large ones
- For oddly shaped items: Create custom padding with towels or blankets
- For sets of items: Keep them together using plastic wrap or ziplock bags
- For fragile stemware: Use specialized wine glass boxes or sturdy cups
- For sharp knives: Use knife guards or wrap in thick cardboard
- For small items: Sort into labeled ziplock bags before boxing
- For appliance parts: Tape small parts to the appliance or put in labeled bags
Special Considerations for Palm Beach Luxury Kitchens
If you’re moving from a high-end Palm Beach home, you likely have specialty items that need extra attention:
- Fine china and crystal: Consider double-boxing with extra padding
- High-end appliances: Save original packaging if possible or hire specialists
- Wine collections: Use specialized wine shipping boxes with molded inserts
- Custom kitchenware: Take detailed photos before disassembling anything
- Specialty cookware: Copper pots, Le Creuset, and other premium items need extra protection
The “Last Box” Strategy
Create a clearly labeled “LAST BOX” (and make it a bright color if possible) that contains:
- Basic cleaning supplies
- Paper towels and trash bags
- A few essential cooking tools
- Paper plates and plastic utensils
- Portable phone charger
- Snacks and water
- Basic first aid kit
- Toilet paper
This box should be loaded last and unloaded first!
The “First Box” Strategy
Similarly, create a “FIRST BOX” for your new kitchen that contains:
- Coffee maker and coffee
- One pot and one pan
- A few place settings
- Basic cooking utensils
- Dish soap and sponge
- Paper towels
- Can opener
- Basic spices and condiments
This ensures you can function in your new kitchen while unpacking at a reasonable pace.
When to Consider Professional Help
Consider hiring professionals if:
- You have many valuable kitchen items
- You’re short on time before the move
- You have physical limitations that make packing difficult
- You get overwhelmed easily by big organizational tasks
- The cost of potentially damaged items exceeds the cost of professional packers
Remember, hiring help doesn’t have to be all-or-nothing. Many people hire professionals just for packing fragile kitchen and dining items while handling the rest themselves.
By avoiding these common mistakes, your kitchen packing will go more smoothly, and you’ll thank yourself when you start unpacking in your new home. A little extra care now means fewer replacement purchases and more time enjoying your new space!
Getting Help Can Make Things Easier
For Palm Beach homeowners with big kitchens full of nice things, professional packing help can be worth every penny. Professional organizers:
- Work quickly and methodically
- Know exactly how to protect valuable items
- Have all the right packing materials
- Can help organize as they pack
Conclusion
Learning how to pack a kitchen for moving takes some planning and care, but it’s totally doable! With the right supplies and a bit of organization, you can get everything safely to your new home without the stress.
For Palm Beach residents looking to make moving day as smooth as possible, getting professional help can be a game-changer. At Palm Beach Organized, we specialize in helping homeowners pack efficiently and set up systems that make unpacking in your new kitchen a breeze.
Want to make your move less stressful? Contact Palm Beach Organized today for help with packing your kitchen, and see how our organizing services can make your move so much easier!

